Deploying the backend in your AWS account – Configuring an AWS Snowcone Device to Be an IOT Gateway
AWS IoT Greengrass requires several policies and other constructs to be created in your account before you can attach devices to it. This section will walk you through using a set of AWS CloudFormation templates to automate the creation of these backend components.
Recommendation – use Linux or install WSL2
All command-line operations shown are for a Linux-based operating system. If you are a Windows user, it is recommended you install Windows Subsystem for Linux 2 (WSL2) so that you may directly use the commands shown without needing to translate them to PowerShell or CMD-style batch commands.
Step 1 – Installing and configuring AWS CLI v2
If you do not have AWS CLI v1 installed, simply execute the following commands:
curl \
“https://awscli.amazonaws.com/awscli-exe-linux-x86_64.zip” \
-o “awscliv2.zip”
unzip awscliv2.zip
sudo ./aws/install
If you need to upgrade from AWS CLI v1 to v2, use the following commands instead:
curl \
“https://awscli.amazonaws.com/awscli-exe-linux-x86_64.zip” \
-o “awscliv2.zip”
unzip awscliv2.zip
sudo ./aws/install \
–bin-dir /usr/local/bin \
–install-dir /usr/local/aws-cli \
–update
Whichever method you use, the installation process can take as long as 5 minutes. See the User Guide for Version 2 in the AWS Command Line Interface documentation for more details if you run into any trouble.
Next, configure the AWS CLI with administrative credentials for your account, and set the default region. The access key and secret access key can be obtained from the AWS Management Console under IAM > Users > Credentials:
aws configure \
set aws_access_key_id “your_access_key”
aws configure \
set aws_secret_access_key “your_secret_key”
aws configure \
set region “your_region”
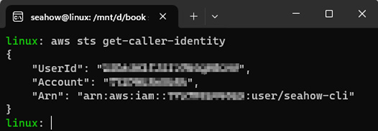
To make sure you are connected to your AWS account, execute the following command. It should show your account ID. Here’s an example of what you should see:

Figure 12.15 – Retrieving the account ID the AWS CLI is connected to
Step 2 – Cloning the code repository from GitHub
Clone the repo from GitHub with the following command:
git clone \
https://github.com/PacktPublishing/Edge-Computing-with-Amazon-Web-Services.git
The next figure gives an example of what you should see:

Figure 12.16 – Cloning the repository from GitHub
Step 3 – Copying the code repository to your S3 bucket
We need to copy the contents of the code repo up to your personal S3 bucket so that we can execute CloudFormation templates from there.
Change directory to the root of the code repository you downloaded and synchronize its contents up to the bucket you just created. Replace your_bucket_name with whatever you named your S3 bucket:
cd Edge-Computing-with-Amazon-Web-Services
aws s3 sync . s3://your_bucket_name
The following figure gives an example of what you should see:

Figure 12.17 – Synchronizing the repository to your S3 bucket
Step 4 – Deploying the CloudFormation templates
Deploy the main.yaml CloudFormation template from your bucket. Replace your_bucket_name with whatever you named your bucket:
aws cloudformation create-stack \
–stack-name greengrass-backend \
–template-url https://your_bucket_name.s3.amazonaws.com/greengrass-backend/cloudformation/main.yaml \
–capabilities CAPABILITY_NAMED_IAM CAPABILITY_IAM CAPABILITY_AUTO_EXPAND \
–parameters ParameterKey=S3Bucket,ParameterValue=your_bucket_name \
ParameterKey=S3Path,ParameterValue=greengrass-backend/cloudformation
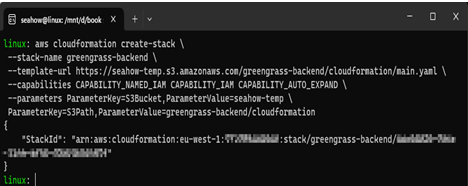
The following figure shows an example of this:

Figure 12.18 – Example of successfully deploying the CloudFormation templates
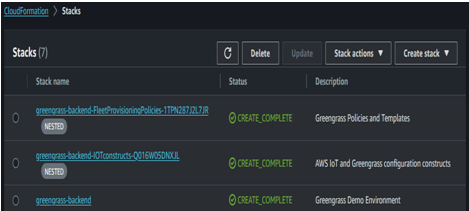
Wait approximately 5 minutes for the primary stack and its two substacks to fully deploy. You can see their status and troubleshoot any deployment issues in the AWS Management Console under CloudFormation > Stacks. The following figure shows an example of what they look like after successful deployment:

Figure 12.19 – CloudFormation templates in CREATE_COMPLETE state
Step 5 – Retrieving outputs from CloudFormation and passing them to environment variables
Retrieve the outputs of the Greengrass-backend stack you just deployed and your account ID and insert them into environment variables:
export CLAIMPOLICY=$(aws cloudformation describe-stacks \
–query ‘Stacks[?StackName==`greengrass-backend`][].Outputs[?OutputKey==`GreengrassProvisioningClaimPolicy`].OutputValue’ \
–output text)
export SERVICEROLE=$(aws cloudformation describe-stacks \
–query ‘Stacks[?StackName==`greengrass-backend`][].Outputs[?OutputKey==`GreengrassServiceRole`].OutputValue’ \
–output text)
export ACCOUNTID=$(aws sts get-caller-identity \
–query “Account” \
–output text)
Step 6 – Configuring the AWS IoT Greengrass v2 service policy on your account
Associate the AWS IoT Greengrass v2 service policy with the AWS CloudFormation stack generated to your account:
aws greengrassv2 associate-service-role-to-account \
–role-arn arn:aws:iam::$ACCOUNTID:role/service-role/$SERVICEROLE
The next figure shows an example of this:

Figure 12.20 – Example of successfully associating the AWS IoT Greengrass v2 service role
At this point, everything needed on the backend is created and ready for you to attach your AWS Snowcone device as an AWS IoT Greengrass Core device. The next section will give you the procedure for doing so.